I have found people fall into two camps when it comes to foam rolling.
Members of Camp A know about foam rolling and do it as regularly as they can. Those in Camp B have heard of foam rolling, but they just aren't quite sure why they need to do it.
In today's column, I am going to break down what foam rolling is as well as show four moves that will hit all the tight areas in the body.
Foam rolling is a form of myofascial release, which is just a fancy word for releasing muscle tightness and trigger points, or "knots," in the muscles.
It's been used for years by professional athletes and therapists, and now can be found in gyms and studios throughout (at The Studio we offer two onehour Stretch & Roll classes a week).
Rolling is likened to the "poor person's" massage and a regular romp with your roller will help prevent injuries, improve your spinal alignment and posture, and increase your flexibility and mobility.
Here are some tips when rolling: Keep your rolling slow and controlled.
Move in multiple directions, don't just roll up and down and down and up.
Add side-to-side movements, cross-friction and flexing and extending of the joint being rolled.
Roll for 30 to 60 seconds an area.
Use your arms and legs to help move your body and roll the roller.
Rolling a muscle may be a little painful, however, you don't want to be screaming in pain. Rolling too hard on the muscles will activate the muscle spindles, causing more muscle tightness. That's not our goal with rolling.
Here are some exercises to try:
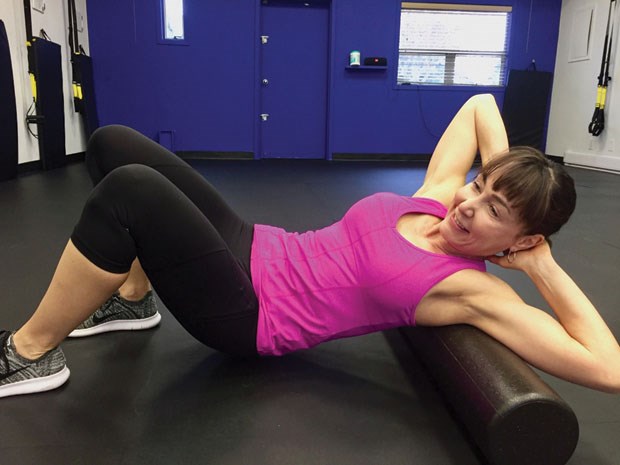
1. SHOULDERS, SIDES & LATS
Lie on your back with the foam roller behind your shoulders. Lace your fingers loosely behind your head and lean your upper back into the foam roller. Brace your abs and glutes for stability, and slowly press into the roller on your left side, raising your right shoulder. Roll towards your left underarm to the bottom of your rib cage.
2. OUTER HIP, THIGHS & IT BAND
Lie on your side with the foam roller under your left hip. Using your bottom elbow and back foot for support, slowly roll down from your hip to just above your knee. Remember to roll side-to-side as well so you get some of the outer edges of the quads and hamstrings.
3. PIRIFORMIS
Sit with your left glute on top of the roller, knees bent and leg crossed over left.
Shift your weight to the left side, rolling over the glutes until you feel tension in your right upper glute. Roll up and down as well as side-to-side.
4. THORACIC SPINE & PEC STRETCH
Lie face-up, feet shoulder-width apart and flat on the floor. Centre the roller beneath your mid-back. Interlace your hands and place them behind the head, allowing the arms to hold onto the head. Keeping the elbows back, extend over the roller and hold. Make sure the lower back doesn't extend - think about pushing the lumbar spine into the ground as you are going over the roller.
PJ Wren is owner of The Studio. Join their Stretch & Roll classes at www.thestudio.ca.


